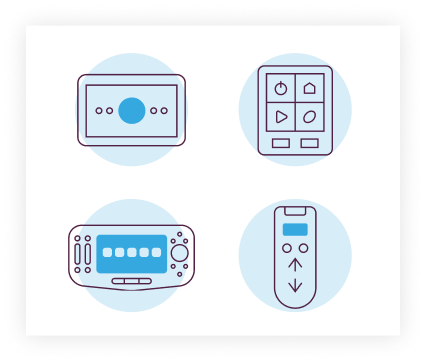
HVAC-Home Automation
Integration Guide

Welcome to our step-by-step guide on integrating home automation and HVAC systems using CoolAutomation devices.
Choose your HVAC System
VRF
Inverter Split / Multi Split
Legacy / Traditional
Other
VRF
VRF (Variable Refrigerant Flow) HVAC systems are ideal for high-end residential and commercial applications. A single outdoor unit can service multiple interconnected indoor units, providing enhanced flexibility, zoning capabilities, energy efficiency, and precise climate control.
CoolAutomation integration device
CoolMaster Product Line
CoolMaster devices can seamlessly connect to your VRF HVAC system's central communication bus, automatically detecting all connected indoor units (or zones) and seamlessly integrating with the chosen home automation platform.
CoolMaster Product Line
CoolPlug and CooLinkHub
CooLinkBridge
Get a price quote
Network Connectivity and HVAC Integration
Software Configuration

Complete the setup process by selecting the relevant equipment through your home automation devices.

A. System Controllers: The Essential Component

Set up the CoolAutomation controller using your home automation platform.

Our controllers offer advanced processing capabilities as well as instant two-way communication with third-party devices and subsystems, making them ideal for both residential and commercial applications. They provide a variety of outputs and scaling capabilities.

B. Visualization Components for HVAC System Control

Choose from a range of visualization components to enhance the control and user experience of your HVAC system. Options include table touchscreen controllers, handheld touchscreen controllers, in-wall touchscreens, and handheld remotes. Additionally, you can use the app as an additional control option for all the selected equipment.

C. Configuration in the Accelerator Software
  1. Download/add the CoolAutomation module from your home automation platform’s portal or extension library.
  2. Add the devices and configure their network settings.
  3. Incorporate user interfaces and macros, then download them to the controller.
  4. Design buttons and sliders in the graphical user interface (GUI) to complete the project.
  5. Download detailed instructions here
Inverter Split / Multi Split
Inverter split / multi split HVAC systems consist of one or multiple air handlers and a single outdoor outdoor unit with an inverter compressor.
CoolAutomation integration device
CoolPlug & CooLinkHub
A CoolPlug is attached to each indoor unit, with up to 10 CoolPlugs connecting to a single CooLinkHub. The CooLinkHub then connects to your preferred home automation platform. CoolPlugs can communicate with a CooLinkHub either via wired or wireless connection.
CoolMaster Product Line
CoolPlug and CooLinkHub
CooLinkBridge
Get a price quote
Network Connectivity and HVAC Integration
Software Configuration

Complete the setup process by selecting the relevant equipment through your home automation devices.

A. System Controllers: The Essential Component

Set up the CoolAutomation controller using your home automation platform.

Our controllers offer advanced processing capabilities as well as instant two-way communication with third-party devices and subsystems, making them ideal for both residential and commercial applications. They provide a variety of outputs and scaling capabilities.

B. Visualization Components for HVAC System Control

Choose from a range of visualization components to enhance the control and user experience of your HVAC system. Options include table touchscreen controllers, handheld touchscreen controllers, in-wall touchscreens, and handheld remotes. Additionally, you can use the app as an additional control option for all the selected equipment.

C. Configuration in the Accelerator Software
  1. Download/add the CoolAutomation module from your home automation platform’s portal or extension library.
  2. Add the devices and configure their network settings.
  3. Incorporate user interfaces and macros, then download them to the controller.
  4. Design buttons and sliders in the graphical user interface (GUI) to complete the project.
  5. Download detailed instructions here
Legacy / Traditional
Legacy or traditional HVAC systems are commonly found in North and South American markets. These systems are powered by 24 VAC relays, and can be controlled using a standard 24 VAC, 5-wire thermostat. They are widely used and known for their reliability in residential and commercial settings.
CoolAutomation integration device
CooLinkBridge
CooLinkBridge is designed to seamlessly integrate with various types of HVAC systems, including, underfloor heating, legacy units, thermostats, fan coil units, heat pumps, and more.
CoolMaster Product Line
CoolPlug and CooLinkHub
CooLinkBridge
Get a price quote
Network Connectivity and HVAC Integration
Software Configuration

Complete the setup process by selecting the relevant equipment through your home automation devices.

A. System Controllers: The Essential Component

Set up the CoolAutomation controller using your home automation platform.

Our controllers offer advanced processing capabilities as well as instant two-way communication with third-party devices and subsystems, making them ideal for both residential and commercial applications. They provide a variety of outputs and scaling capabilities.

B. Visualization Components for HVAC System Control

Choose from a range of visualization components to enhance the control and user experience of your HVAC system. Options include table touchscreen controllers, handheld touchscreen controllers, in-wall touchscreens, and handheld remotes. Additionally, you can use the app as an additional control option for all the selected equipment.

C. Configuration in the Accelerator Software
  1. Download/add the CoolAutomation module from your home automation platform’s portal or extension library.
  2. Add the devices and configure their network settings.
  3. Incorporate user interfaces and macros, then download them to the controller.
  4. Design buttons and sliders in the graphical user interface (GUI) to complete the project.
  5. Download detailed instructions here
Other
If your HVAC system doesn't fall into any of the aforementioned categories, don't worry! We may still have a solution for you. Simply reach out to us with the specific brand and models of your HVAC system, and our team will gladly assist you in finding a suitable solution tailored to your needs. 
Network Connectivity and HVAC Integration
Software Configuration

Complete the setup process by selecting the relevant equipment through your home automation devices.

A. System Controllers: The Essential Component

Set up the CoolAutomation controller using your home automation platform.

Our controllers offer advanced processing capabilities as well as instant two-way communication with third-party devices and subsystems, making them ideal for both residential and commercial applications. They provide a variety of outputs and scaling capabilities.

B. Visualization Components for HVAC System Control

Choose from a range of visualization components to enhance the control and user experience of your HVAC system. Options include table touchscreen controllers, handheld touchscreen controllers, in-wall touchscreens, and handheld remotes. Additionally, you can use the app as an additional control option for all the selected equipment.

C. Configuration in the Accelerator Software
  1. Download/add the CoolAutomation module from your home automation platform’s portal or extension library.
  2. Add the devices and configure their network settings.
  3. Incorporate user interfaces and macros, then download them to the controller.
  4. Design buttons and sliders in the graphical user interface (GUI) to complete the project.
  5. Download detailed instructions here
Strip: Partners, Blue
Need Help with a Specific Integration Setup?
Contact Us