Your HVAC Systems
Just Got Smarter
Smartly control your systems like never before.
Save energy. Enhance service. Reduce costs.
Save energy. Enhance service. Reduce costs.
Simple and efficient solutions for
managing, monitoring and controlling
your HVAC systems
managing, monitoring and controlling
your HVAC systems
CoolAutomation is a global leader in smart solutions for HVAC systems, specializing in VRF/VRV, split, and air to water heat pumps systems. With over 10,000 customers and 50,000 sites in more than 100 countries, our innovative products enable seamless and universal HVAC integration, remote management, predictive maintenance, remote diagnostics, and universal automated system control.
20+
Compatible HVAC Brands
30+
Home Automation Partners
Up to
30%
Energy Savings
Over
50000
Connected Sites
Smart HVAC Management Solutions
Our HVAC cloud solutions and integration devices are designed to meet the unique needs of various industries, streamline processes and improve efficiency.


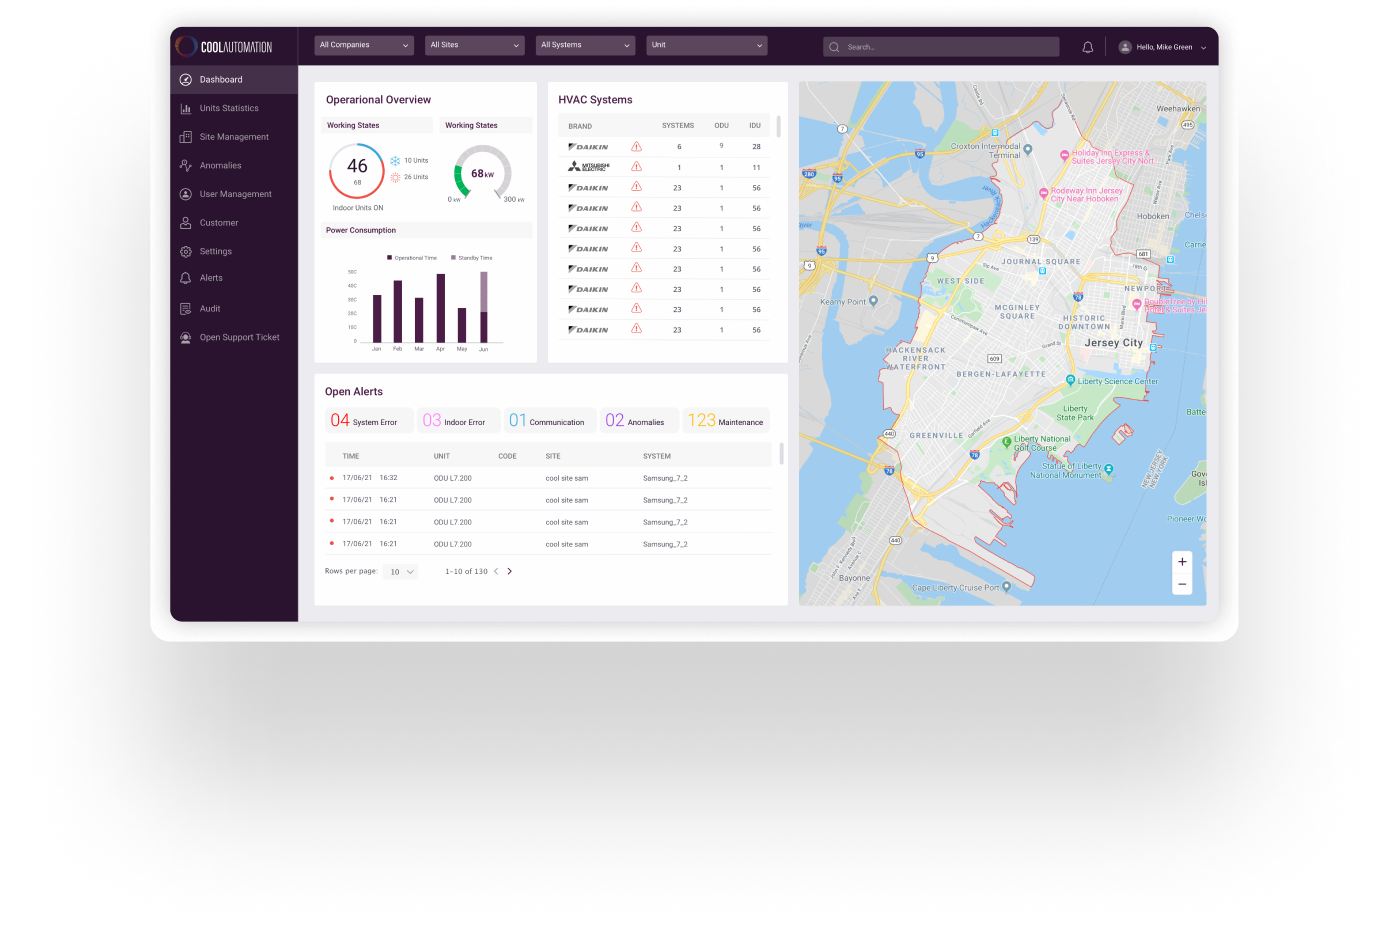
Cloud solutions
Review our cloud-based HVAC management & monitoring solutions
HVAC Predictive Maintenance
Automatically detect HVAC system anomalies early or even before they happen and prevent system downtime. Learn more
Advanced HVAC Operations
Maintain total control over multiple HVAC systems, brands, and locations while maximizing energy efficiency. Learn more
VRF Power Distribution
Allows for accurate billing of tenants based on the actual operational demand of each indoor unit. Learn more
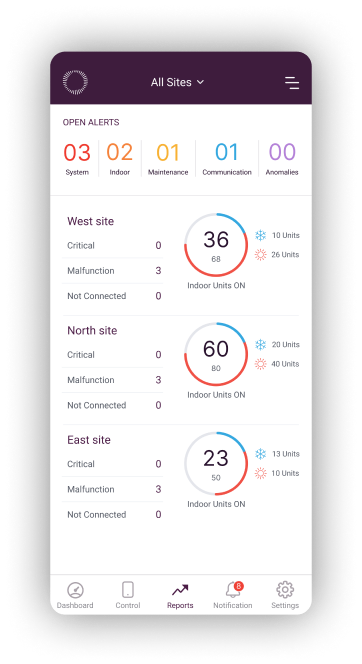
HVAC Control
Smart control application for residential sites that allows users to schedule, control, and manage HVAC systems remotely. Learn more
Developer’s API
Customize your control and management application, or integrate your preferred HVAC functionalities into an existing application. Learn more


Integration Devices
Select the device that best fits your needs
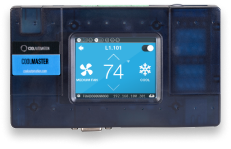
CoolMaster Product Line
Enable seamless and universal integration of Home Automation and Building Management System (BMS) with any VRF or VRV HVAC system. Learn more
CoolPlug
Enables simple integration of Split, Multi-Split, or Mini-Split HVAC systems with Home Automation, BMS, and Cloud Control Applications. Learn more
CoolLinkBridge
Plug & play integration of Home Automation, BMS, and Cloud Control Apps with HVAC Zone Control Units, A2W Heat Pumps, Underfloor Heating, and more Learn more
Smart Device Integration
Control your VRF/VRV and split HVAC systems by connecting them to your voice assistants and smart home devices. Learn more
Other HVAC Control Devices
Comprehensive set of solutions for seamless integration into home automation systems. Learn more


Why Choose CoolAutomation?


A word from our customers


After integrating VRF systems for 20+ years, the method I choose again is through CoolMasterNet. It simplifies the communication to a complex HVAC system, and it allows to control it locally via a home automation system (Crestron, Savant, etc.) and remotely for diagnostics purposes. We rely on CoolAutomation solutions in high-end residential projects installed by the top-notch HVAC contractors in New York City. The solution never fails!
Sal Navaro, Technical Director
We have been using CoolAutomation's CoolMasterNet solution for more than a decade. Without CoolMasterNet, HVAC integration was not efficient and time-consuming. Each HVAC manufacturer has its own protocol, so we had to understand each one and create a separate module for each brand. We also used different adapters. Sometimes they worked, sometimes not. Once we started using CoolMasterNet, everything became easier, simpler, and faster. All we need to do is connect the HVAC to CoolMasterNet, and to the Home Automation controller - and the HVAC is integrated in no time.
Sergey Staroseletski, Integrator
From a service manager's position, having the ability to remotely monitor and diagnose is a real benefit for our company and our clients. It both saves time and money, and best of all - ensures minimal downtime, compared to traditional diagnostic methods. The GUI is fantastic, making for easy diagnostics and having the ability to sort data accordingly.
Josh Morgan, Service Manager
Using CoolAutomation has saved us countless hours of call outs and labor, minimizing time by utilizing their unique cloud-based solution. By diagnosing the Daikin VRV equipment remotely and efficiently, senior technicians ensure minimal equipment downtime. We can set schedules, restrict wall controller operation, set auto heat/cool logic, change over rules and monitor real-time energy consumption. Using these control strategies has already reduced energy and maintenance costs and presumably increased equipment lifespan.
Alan Bedford, Facilities Manager
The Coolmaster Gateway integrated smoothly with Legrand's MYHOME Automation system in a stylish new home with a 12 zone VRF HVAC system. As soon as the HVAC bus was connected to the gateway it picked up all of the zones immediately, so it was just a matter of assigning the Legrand Living Now Thermostats to the zones picked up by the Coolmaster and job done! Always nice to see systems working together so well, and that's thanks to CoolAutomation’s quality device.
Tomi Brcic, Technical and Services Manager

